MPC Touch - Complete Setup and Routing in Cubase
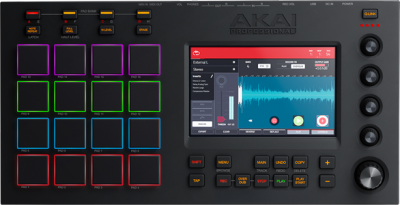 The MPC Touch and included MPC software combine to create a powerful beat-making machine, incorporating all elements of the legendary MPC workflow. Using the MPC software as a plugin adds even more features and options to connect and interact with your favorite DAW. This guide walks you through everything you need to know about using the Akai Pro MPC Touch as a plug-in inside Cubase.
Contents
- Authorizing MPC
- Loading the Plug-in
- Mapping the Transport Controls
- Using the Multi Output plug-in option
- Exporting Audio from the MPC Plug-in
- Additional Guides & Videos
- Further Technical Support
Authorizing MPC
Loading the Plug-in
For Windows user's, the Cubase software is pre-configured to search for your plugins in the Steinberg folder within your Program Files on your hard drive. If you have created a custom location for your plug-ins, be sure to direct Cubase to this location by creating a new path in the plug-in manager before completing this section.
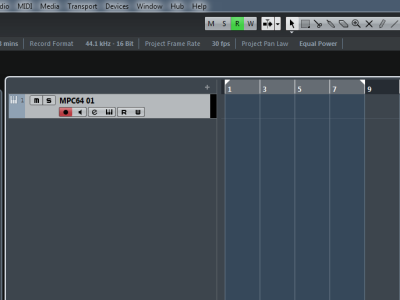
- In Cubase, press Project > Add Track > Instrument
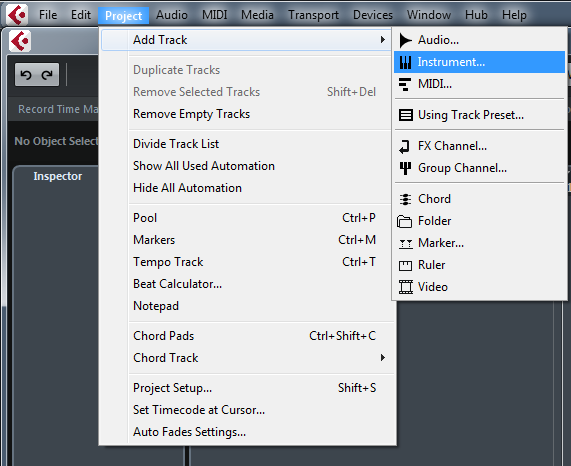
- Select the MPC Plug-in as your instrument and press Add Track.
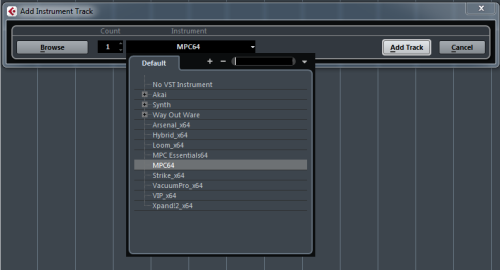
- The MPC Plug-in will then launch in your Cubase Session.
Mapping the Transport Controls
Cubase uses .xml files to map controls like the transport to their software. We have a pre-configured .xml file prepared to help you quickly the sync the MPC Touch transport with Cubase. Download the file below and follow the steps to install:
- Navigate to the Device Menu and select Device Setup.
- In Device Setup, select Generic Remote from the Devices list, and choose Public for both MIDI Input & Output drop-down menus.
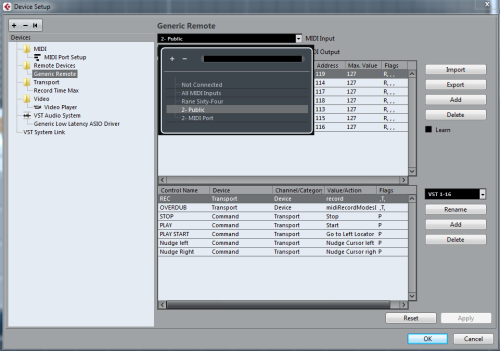
- Still, in the Generic Remote page, select the Import button, and load the Akai MPC Touch.xml, which will provide transport control from the MPC Touch to Cubase

- Select Apply, then OK.
Using the Multi Output plug-in option
While MPC is running as a plugin inside Cubase, you can route individual MPC tracks to their own tracks in Cubase to make it easier for mixing.
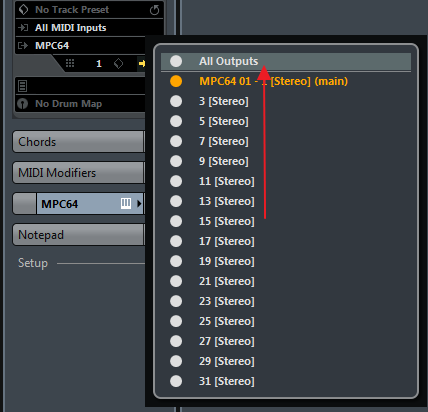
- In the Inspector, Click the Activate Outputs button - the arrow to the right of the VST name.

- Click the All Outputs option to highlight and enable all of MPC's 16 stereo outputs or just select the outputs you plan to use.
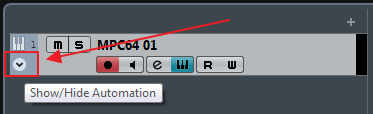
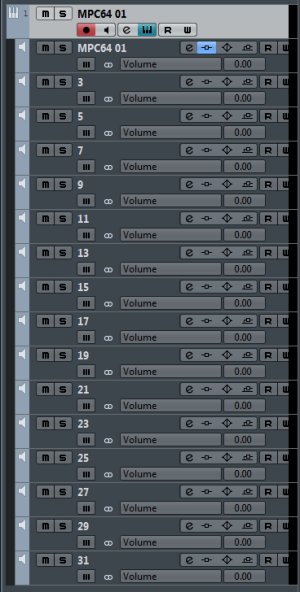
- On the MPC software instrument track, click the Show/Hide Automation button to reveal the individual output tracks.
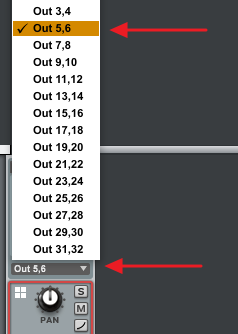
- In MPC, route your programs or tracks to different output channels. You can do this from the Program or Track Mixer in MPC by clicking on the output drop-down menu for the chosen track, just above the channel fader and pan for each track.
And that's it! The individual audio tracks in Cubase will receive audio from the corresponding tracks in MPC.
Exporting Audio from the MPC Plug-in
You may have noticed that the sequences you have created within the MPC plug-in do not show up in your Cubase session. This is normal.
The sequence you have created will export within the region you select in your session.
- Choose the region length of the song you want to export.
- With your region selected, go to File > Export > Audio Mixdown
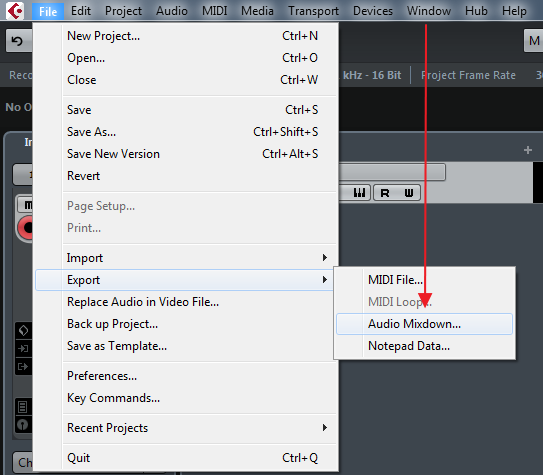
- Name your track, choose a location, and select the desired quality of the export.
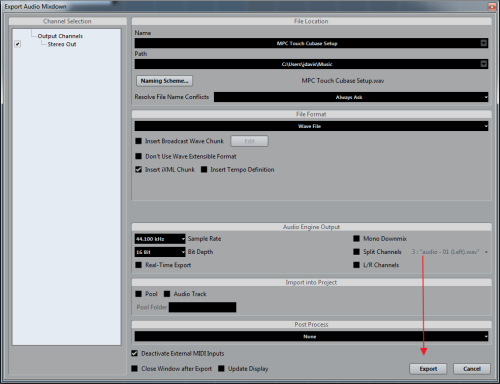
- Click Export to bounce your sequence/song.
Additional Guides & Videos
Further Technical Support
Whether you are a customer or dealer, if you already own an Akai Pro product, or if you just have pre-sales questions, the Akai Pro technical support team is available to help!
Visit the link below to connect with any of the following support options: online community support, phone support, email support.