M-Audio Trigger Finger Pro - Studio One 2 & Arsenal Setup

The M-Audio Trigger Finger Pro is a very versatile hardware sequencer that works with any music recording or DJ software that supports MIDI. The following guide will cover the basic setup with Studio One 2, as well as take a brief look at some the more advanced Mackie/HUI control assignments.
Table of Contents:
- Trigger Finger Pro Hardware Setup
- Advanced Mixer, and Transport Assignments
- Studio One 2 External Device Options
- Loading Arsenal as a Plug-in
- Further Product Support
Trigger Finger Pro Hardware Setup
- Plug in the USB, and Power on the Trigger Finger Pro.
- Turn the top encoder to PRESET 08: Studio One & Arsenal.
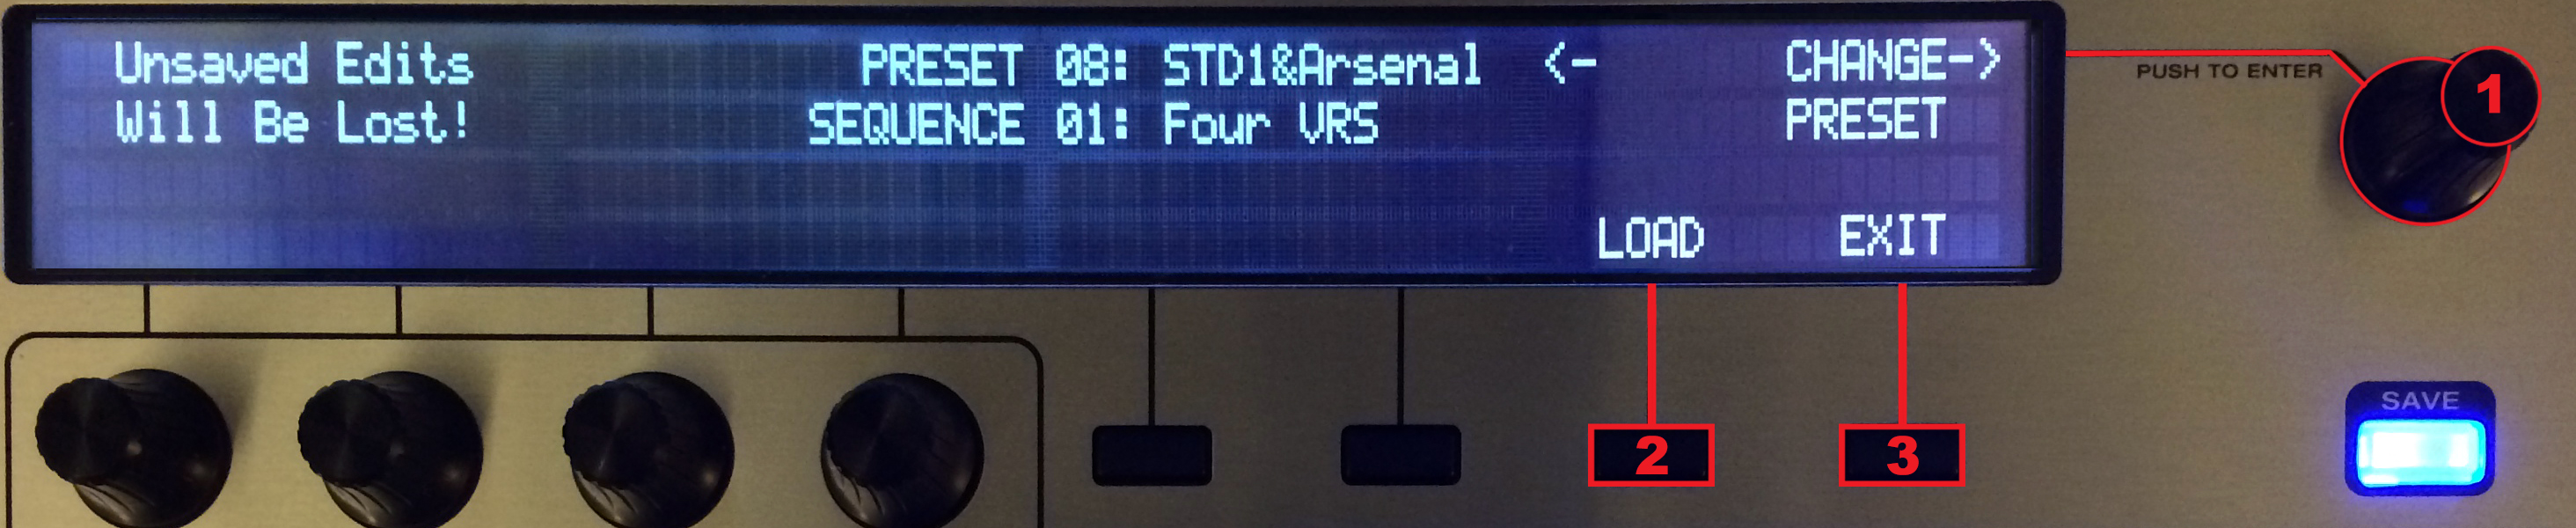
- Press the menu button below LOAD to load the selected preset.
- Press the menu button below EXIT to exit the Preferences.
If you wish to use the standard preset feel free to skip the Advanced section below, and go directly to software setup & preferences.
Advanced Mixer, and Transport Assignments
The Trigger Finger Pro gives you the ability to completely customize the assignments, and functions of the Transport controls, Cursors (DAW Control), and Mixer section (Control Bank). Lets take a look at a few of those settings.
- Press the CTRL button to open Mapping Assignments.

- Turn the Top Encoder (2) to cycle between Knobs, Faders, Buttons, and Advanced.
- Press the menu button (1) below MAPPING:Arsenal/Mackie. This will allow you to assign the Knobs, Faders, and Buttons of Banks A, B, C, & D to control Arsenal, HUI, Mackie, MIDI depending on your desired setup. For Studio One controls you will want to select Mackie.

Mapping Assignment Controls

- The Menu Button (1) below TOGGLE: ALL will change all Banks A, B, C, D to the same setting (Arsenal, HUI, Mackie, MIDI).
- The Encoder Knob (2) will switch between Knobs, Faders, Buttons, and Advanced.
- The Mixer knob (3) will change the individual assignment of its corresponding Bank (A,B,C,D).
Assigning Transport Controls
The Transport buttons can be assigned to control various functions including None, MIDI R/T, MMC, MIDI + MMC, MIDI CC, Mackie, and HUI. For Studio One we will be using the Mackie setting. When the Studio One & Arsenal preset is loaded the Transport, and Cursors are automatically configured to Mackie. If you wish to change this see the steps below.
- Press the CTRL button.
- Turn the CTRL TYPE Encoder Knob until it reads ADVANCED in the top left corner.
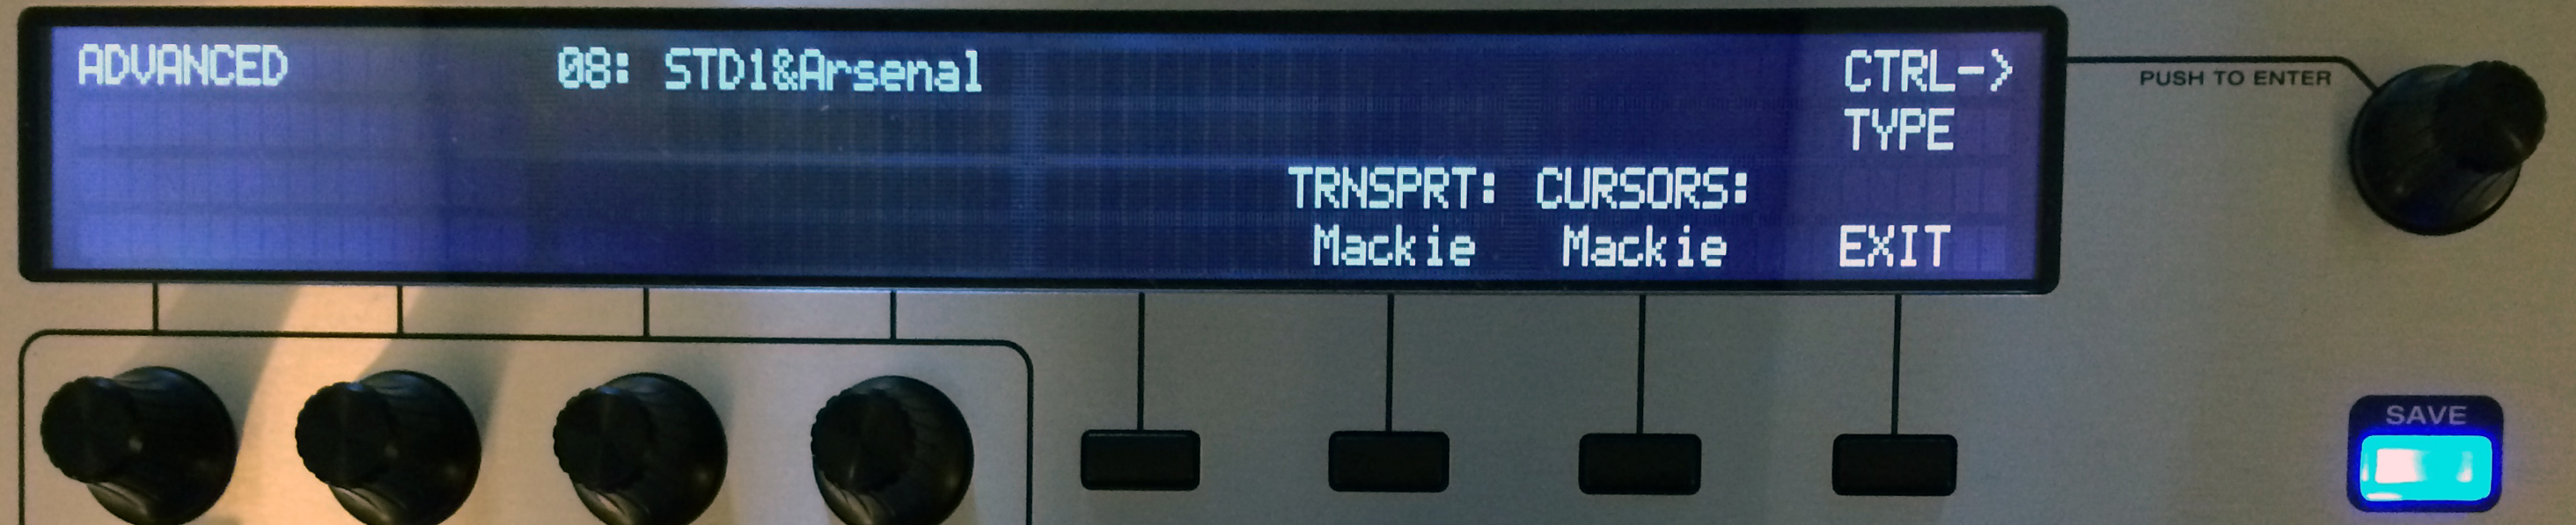
- Press the menu button below TRNSPRT: until it reads Mackie (Studio One), or your desired setting.
- Press the CTRL button.
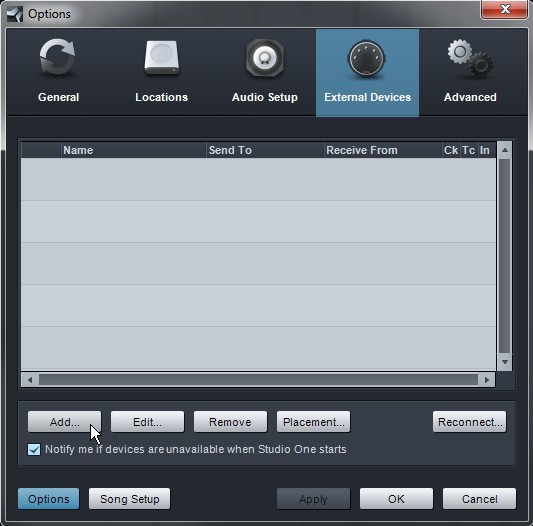
Studio One 2 External Device Options
- Open Studio One 2, and create a new song.
- From the top menu click Studio One > Options...

- Select the External Devices tab, then click Add...
- Find, and open the Mackie folder in the device list on the left, and choose Control.
- Set the Receive From, and Send To options both to MIDIIN2 (Trigger Finger Pro).
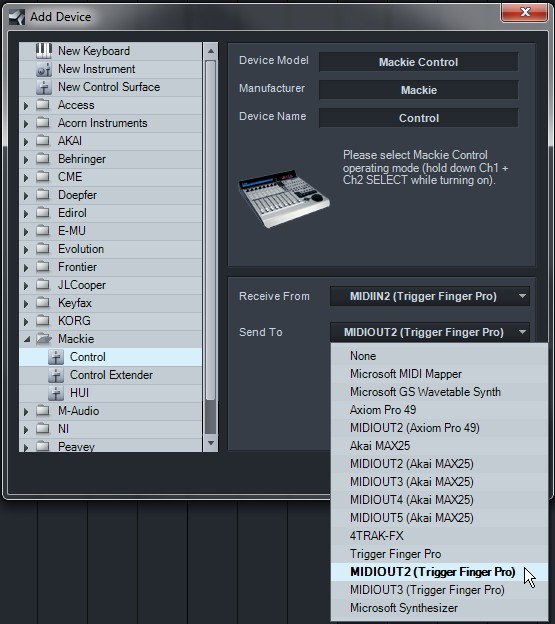
- Click OK to close the Device list, and then again to close the Options window.
Note: The Trigger Finger Pro, Arsenal port should only be used when running Arsenal as a standalone sound module, and not inside your DAW.
Loading Arsenal as a Plug-in
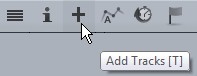
- Add a new Instrument Track by clicking the + symbol above the track section, or by pressing T on the keyboard.
- From the Add Tracks window choose Instrument as the Type.
- For Output select New Instrument, and choose Arsenal from the Instrument list.
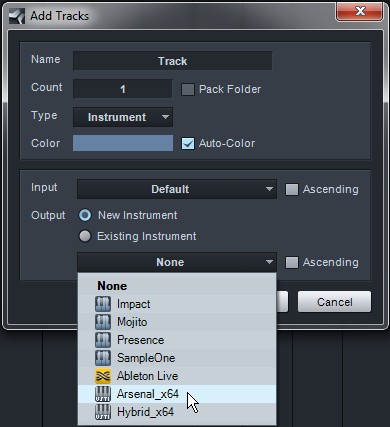
- Click OK to close the Add Tracks window.
Further Product Support
Whether you are a customer or dealer, if you already own an Numark product, or if you just have pre-sales questions, the Numark technical support team is available to help!
Visit the link below to connect with any of the following support options: online community support, phone support, email support.